Building out a test 3-node Elasticsearch 9 cluster on AlmaLinux 9
Intro
We’ll be configuring a (test) three-node Elasticsearch cluster, then installing and joining Kibana, on Alma 9 hosts.
Hardware:
3x KVM VM (4 vCPU, 16 GiB RAM, 128 GB of SSD):
- es9-1
- es9-2
- es9-3
Installing Elasticsearch
Read the docs: installing Elasticsearch, installing Elasticsearch with RPM.
Add the Elastic signing key to your system:
sudo rpm --import https://artifacts.elastic.co/GPG-KEY-elasticsearch
Add the Elasticsearch 9.x repository to the system:
sudo tee /etc/yum.repos.d/elasticsearch.repo > /dev/null << 'EOT'
[elasticsearch]
name=Elasticsearch repository for 9.x packages
baseurl=https://artifacts.elastic.co/packages/9.x/yum
gpgcheck=1
gpgkey=https://artifacts.elastic.co/GPG-KEY-elasticsearch
enabled=0
type=rpm-md
EOT
Note that the repo’s enabled property is set to 0 so you don’t inadvertantly update Elastic.
Install Elastic (from the repo you just added):
sudo dnf install --enablerepo=elasticsearch elasticsearch
[wporter@es9-1 ~]$ sudo dnf install --enablerepo=elasticsearch elasticsearch
Elasticsearch repository for 9.x packages                         5.4 MB/s |  29 MB   00:05
Last metadata expiration check: 0:00:09 ago on Fri 12 Dec 2025 04:47:11 PM EST.
Dependencies resolved.
========================================================================================================================
 Package            Architecture      Version          Repository            Size
========================================================================================================================
Installing:
 elasticsearch          x86_64          9.2.2-1          elasticsearch          656 M

Transaction Summary
========================================================================================================================
Install  1 Package

Total download size: 656 M
Installed size: 1.2 G
Is this ok [y/N]: y
Downloading Packages:
elasticsearch-9.2.2-x86_64.rpm                               11 MB/s | 656 MB   01:01
------------------------------------------------------------------------------------------------------------------------
Total                                          11 MB/s | 656 MB   01:01
Running transaction check
Transaction check succeeded.
Running transaction test
Transaction test succeeded.
Running transaction
  Preparing    :                                                1/1
  Running scriptlet: elasticsearch-9.2.2-1.x86_64                                   1/1
Creating elasticsearch group... OK
Creating elasticsearch user... OK

  Installing     : elasticsearch-9.2.2-1.x86_64                                   1/1
  Running scriptlet: elasticsearch-9.2.2-1.x86_64                                   1/1
--------------------------- Security autoconfiguration information ------------------------------

Authentication and authorization are enabled.
TLS for the transport and HTTP layers is enabled and configured.

The generated password for the elastic built-in superuser is : foobar

If this node should join an existing cluster, you can reconfigure this with
'/usr/share/elasticsearch/bin/elasticsearch-reconfigure-node --enrollment-token <token-here>'
after creating an enrollment token on your existing cluster.

You can complete the following actions at any time:

Reset the password of the elastic built-in superuser with
'/usr/share/elasticsearch/bin/elasticsearch-reset-password -u elastic'.

Generate an enrollment token for Kibana instances with
 '/usr/share/elasticsearch/bin/elasticsearch-create-enrollment-token -s kibana'.

Generate an enrollment token for Elasticsearch nodes with
'/usr/share/elasticsearch/bin/elasticsearch-create-enrollment-token -s node'.

-------------------------------------------------------------------------------------------------
### NOT starting on installation, please execute the following statements to configure elasticsearch service to start automatically using systemd
 sudo systemctl daemon-reload
 sudo systemctl enable elasticsearch.service
### You can start elasticsearch service by executing
 sudo systemctl start elasticsearch.service

/usr/lib/tmpfiles.d/elasticsearch.conf:1: Line references path below legacy directory /var/run/, updating /var/run/elasticsearch → /run/elasticsearch; please update the tmpfiles.d/ drop-in file accordingly.

  Verifying    : elasticsearch-9.2.2-1.x86_64                                   1/1

Installed:
  elasticsearch-9.2.2-1.x86_64

Complete!
Note the “generated password for the elastic built-in superuser” in the output from the install command (on node 1).
Depending on the version of AlmaLinux you’re using, you may need to permit TCP ports 9200 and 9300 through the firewall.
Configure the first node
Install with RPM - configure the first node
Edit /etc/elasticsearch/elasticsearch.yml to set the cluster name, node name, and configure the first node to listen on an external address (so you can then join future nodes).
cluster.name: es9c1
node.name: es9-1
Consider setting the network.host parameter to the specific interface(s) you want Elastic to use instead of 0.0.0.0 (everything).
network.host: 0.0.0.0
Then, start Elastic and confirm it’s reachable on port 9200 (you configured the firewall, right?)
sudo systemctl daemon-reload
sudo systemctl enable --now elasticsearch
Installing additional nodes
Node two
Here’s what we’ll need to do to join our second node to the cluster:
- Generate an enrollment token on node 1
- Reconfigure the bare Elasticsearch installation on node 2 with the enrollment token
- Update the
discovery.seed_hostsparameter in/etc/elasticsearch/elasticsearch.ymlon node 1 to include node 2’s FQDN - Then, on node 2, modify
/etc/elasticsearch/elasticsearch.yml:- Set the cluster.name
- Set the node.name
- Bind to more than localhost
- If using DNS, modify
discovery.seed_hostsfrom hardcoded IPs (as seeded by the join operation)
Brief disclaimer:
When you install Elasticsearch, the installation process configures a single-node cluster by default. If you want a node to join an existing cluster instead, generate an enrollment token on an existing node before you start Elastic on the new node for the first time.
So, before we start the second node, we’ll run elasticsearch-create-enrollment-token --scope node on node 1, grab the enrollment token:
[root@es9-1 ~]# /usr/share/elasticsearch/bin/elasticsearch-create-enrollment-token --scope node
foobarbaz=
And reconfigure node 2:
[wporter@es9-2 ~]$ sudo /usr/share/elasticsearch/bin/elasticsearch-reconfigure-node --enrollment-token foobarbaz=
[sudo] password for wporter:

This node will be reconfigured to join an existing cluster, using the enrollment token that you provided.
This operation will overwrite the existing configuration. Specifically:
  - Security auto configuration will be removed from elasticsearch.yml
  - The [certs] config directory will be removed
  - Security auto configuration related secure settings will be removed from the elasticsearch.keystore
Do you want to continue with the reconfiguration process [y/N]y
Update /etc/elasticsearch/elasticsearch.yml to match cluster.name and add the second node.name, change network.host from localhost to an external IP or whatever if you’re not proxying it.
Then, on the first host (in your elasticsearch.yml), update your discovery.seed_hosts:
discovery.seed_hosts: ["es9-2.es.lab.wporter.org:9300"]
When you enroll the second node, its discovery.seed_hosts parameter will be automatically populated with the first node’s IP address. Consider changing this to its FQDN.
Additionally, now would be a great time to update the cluster.name, node.name, and network.host (listen binding) in /etc/elasticsearch/elasticsearch.yml as we did on node 1:
cluster.name: es9c1
node.name: es9-2
network.host: 0.0.0.0
Anyway, go ahead and fire up Elasticsearch on your newly joined second node:
[wporter@es9-2 ~]$ sudo systemctl enable --now elasticsearch
Before adding the third node, make a GET to _cluster/health to confirm the cluster is yellow, not red. If it’s red, wait a few moments for it to stabilize.
{
  "cluster_name": "es9c1",
  "status": "yellow",
  "timed_out": false,
  "number_of_nodes": 2,
  "number_of_data_nodes": 2,
  "active_primary_shards": 42,
  "active_shards": 42,
  "relocating_shards": 0,
  "initializing_shards": 0,
  "unassigned_shards": 42,
  "unassigned_primary_shards": 0,
  "delayed_unassigned_shards": 0,
  "number_of_pending_tasks": 0,
  "number_of_in_flight_fetch": 0,
  "task_max_waiting_in_queue_millis": 0,
  "active_shards_percent_as_number": 50
}
Third node
Now, adding the third node will be nearly the same as the second:
- Create enrollment token on an existing cluster member
- Update the first and second nodes’
discovery.seed_hoststo include the third - Enroll node 3 before starting Elastic for the first time
- Reconfigure node 3:
- Set the cluster.name
- Set the node.name
- Bind to more than localhost
- If using DNS, modify discovery.seed_hosts from hardcoded IPs
Again, before starting Elastic, generate an enrollment token and reconfigure the new node:
[root@es9-1 ~]# /usr/share/elasticsearch/bin/elasticsearch-create-enrollment-token --scope node
[root@es9-3 ~]# /usr/share/elasticsearch/bin/elasticsearch-reconfigure-node --enrollment-token foobarbaz=

This node will be reconfigured to join an existing cluster, using the enrollment token that you provided.
This operation will overwrite the existing configuration. Specifically:
  - Security auto configuration will be removed from elasticsearch.yml
  - The [certs] config directory will be removed
  - Security auto configuration related secure settings will be removed from the elasticsearch.keystore
Do you want to continue with the reconfiguration process [y/N]y
Modify the discovery.seed_hosts on nodes 1 && 2 to include the third node.
Then, modify your /etc/elasticsearch/elasticsearch.yml on node 3 to set the cluster.name, node.name, and listen address.
cluster.name: es9c1
node.name: es9-3
network.host: 0.0.0.0
As with the other node, now would be a great time to reconfigure your discovery.seed_hosts to use the other nodes’ FQDNs rather than their hardcoded IP addresses.
Then, start Elastic:
[root@es9-3 ~]# systemctl enable --now elasticsearch
A GET to _cluster/state/nodes should now show you a happy three-node cluster (each node with all roles):
GET _cluster/state/nodes

{
  "cluster_name": "es9c1",
  "cluster_uuid": "0RWcvfOXTFKe0F_j4zzifQ",
  "nodes": {
  "HSa-SZL8TjqSY1zoaLL--A": {
    "name": "es9-3",
    "ephemeral_id": "QjaK664bSmSMY7HOmmU6CQ",
    "transport_address": "172.27.30.83:9300",
    "external_id": "es9-3",
    "attributes": {
    "xpack.installed": "true",
    "transform.config_version": "10.0.0",
    "ml.config_version": "12.0.0",
    "ml.max_jvm_size": "8250195968",
    "ml.allocated_processors_double": "4.0",
    "ml.allocated_processors": "4",
    "ml.machine_memory": "16497045504"
    },
    "roles": [
    "data",
    "data_cold",
    "data_content",
    "data_frozen",
    "data_hot",
    "data_warm",
    "ingest",
    "master",
    "ml",
    "remote_cluster_client",
    "transform"
    ],
    "version": "9.2.3",
    "min_index_version": 8000099,
    "max_index_version": 9039003
  },
  "VtUfAJIFRQeaeb09NsDdMg": {
    "name": "es9-1",
    "ephemeral_id": "kjEsQBxrRQKZYvLC5j2U5Q",
    "transport_address": "172.27.30.81:9300",
    "external_id": "es9-1",
    "attributes": {
    "transform.config_version": "10.0.0",
    "xpack.installed": "true",
    "ml.config_version": "12.0.0",
    "ml.max_jvm_size": "8250195968",
    "ml.allocated_processors_double": "4.0",
    "ml.allocated_processors": "4",
    "ml.machine_memory": "16497045504"
    },
    "roles": [
    "data",
    "data_cold",
    "data_content",
    "data_frozen",
    "data_hot",
    "data_warm",
    "ingest",
    "master",
    "ml",
    "remote_cluster_client",
    "transform"
    ],
    "version": "9.2.3",
    "min_index_version": 8000099,
    "max_index_version": 9039003
  },
  "BqRTCg29QPCANEkJWueUnw": {
    "name": "es9-2",
    "ephemeral_id": "tPH7ST7WQLOpBbF4NiUkmw",
    "transport_address": "172.27.30.82:9300",
    "external_id": "es9-2",
    "attributes": {
    "xpack.installed": "true",
    "transform.config_version": "10.0.0",
    "ml.config_version": "12.0.0",
    "ml.max_jvm_size": "8250195968",
    "ml.allocated_processors_double": "4.0",
    "ml.allocated_processors": "4",
    "ml.machine_memory": "16497045504"
    },
    "roles": [
    "data",
    "data_cold",
    "data_content",
    "data_frozen",
    "data_hot",
    "data_warm",
    "ingest",
    "master",
    "ml",
    "remote_cluster_client",
    "transform"
    ],
    "version": "9.2.3",
    "min_index_version": 8000099,
    "max_index_version": 9039003
  }
  }
}
Installing Kibana
Kibana is a nice web UI for Elastic.
You only need to install Kibana in one place (this doesn’t even have to be on the Elastic cluster, you can certainly join an external Kibana install) but you can install it on all cluster members if you want (and generally, with a small number of big hosts, folks do just this.)
This requires the Elasticsearch PGP key. Grab it if you don’t have it from installing Elastic:
sudo rpm --import https://artifacts.elastic.co/GPG-KEY-elasticsearch
Then, add the Kibana yum repo to your system:
sudo tee /etc/yum.repos.d/kibana.repo > /dev/null << 'EOT'
[kibana-9.X]
name=Kibana repository for 9.x packages
baseurl=https://artifacts.elastic.co/packages/9.x/yum
gpgcheck=1
gpgkey=https://artifacts.elastic.co/GPG-KEY-elasticsearch
enabled=1
autorefresh=1
type=rpm-md
EOT
Since I don’t really care whether Kibana gets updated, I’ve left the repo enabled=1, unlike Elastic itself.
Install and enable the Kibana service so it runs at startup:
sudo dnf install -y kibana
sudo systemctl enable --now kibana
Consider changing the listen address from localhost so Kibana binds to all IPs. You can do so by editing the /etc/kibana/kibana.yml file to set:
server.host: 0.0.0.0
Alternatively, consider proxying Kibana and Elastic with NGINX. I was just getting a basic cluster going for some testing here, so I didn’t bother.
The Elastic utilities are in $ES_HOME, which is /usr/share/elasticsearch/ when it’s installed with the RPM package. Use the elasticsearch-create-enrollment-token to generate a token for Kibana.
[wporter@es9-1 ~]$ cd /usr/share/elasticsearch/
[wporter@es9-1 elasticsearch]$ ls bin/
elasticsearch       elasticsearch-cli            elasticsearch-env      elasticsearch-keystore  elasticsearch-reconfigure-node  elasticsearch-service-tokens   elasticsearch-sql-cli      elasticsearch-users
elasticsearch-certgen   elasticsearch-create-enrollment-token  elasticsearch-env-from-file  elasticsearch-node    elasticsearch-reset-password  elasticsearch-setup-passwords  elasticsearch-sql-cli-9.2.2.jar  systemd-entrypoint
elasticsearch-certutil  elasticsearch-croneval         elasticsearch-geoip      elasticsearch-plugin  elasticsearch-saml-metadata   elasticsearch-shard      elasticsearch-syskeygen
/usr/share/elasticsearch/bin/elasticsearch-create-enrollment-token --scope kibana
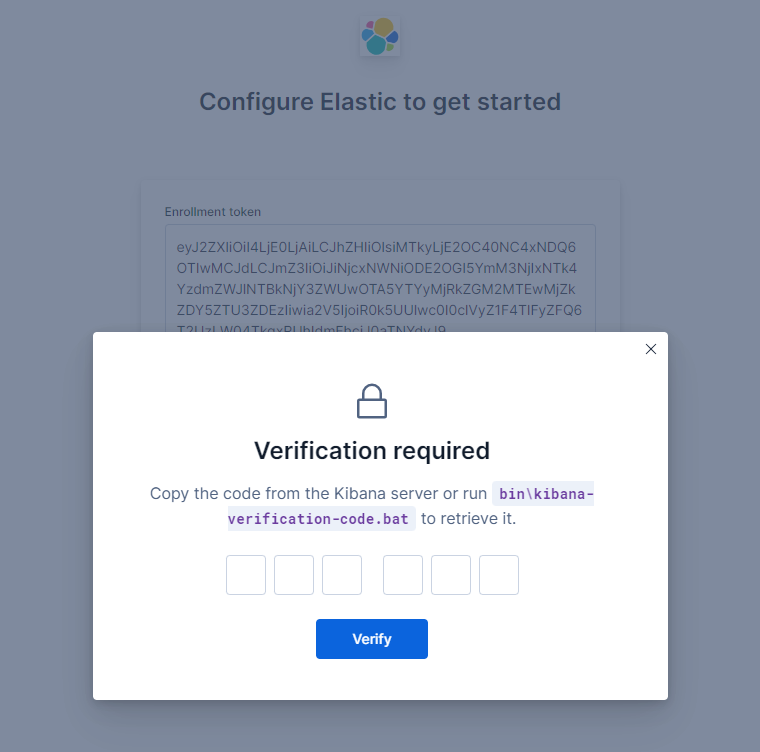
Then, paste the code into the Kibana UI (port 5601) to join Kibana.
On your Kibana server, generate a verification code to finalize the join process:
[wporter@es9-1 ~]$ sudo /usr/share/kibana/bin/kibana-verification-code
Your verification code is:  443 007
Finally, consider updating your Kibana configuration so it can connect to any of the three hosts (modify elasticsearch.hosts in your `/etc/kibana/kibana.yml to include all three), e.g.:
elasticsearch.hosts:
  - https://es9-1.elastic.wporter.org:9200
  - https://es9-2.elastic.wporter.org:9200
  - https://es9-3.elastic.wporter.org:9200